
Iron farms are top-of-the-line obtainable to Minecraft survival gamers. Iron is an extremely helpful useful resource, wanted to make instruments, armor, shields, and completely different mechanical elements, resembling minecarts and hoppers. Which means having ample iron is important to any long-lived survival playthrough.
Fortunately, gamers can make the most of village iron golem spawning mechanics to automate the method of accumulating iron. The design for a easy Bedrock iron golem farm is detailed beneath.
” class=”promoted-img” loading=”lazy” width=”1440″ peak=”220″ alt=”fortnite-promotional-banner” />
Methods to construct a easy Minecraft Bedrock iron farm
Supplies
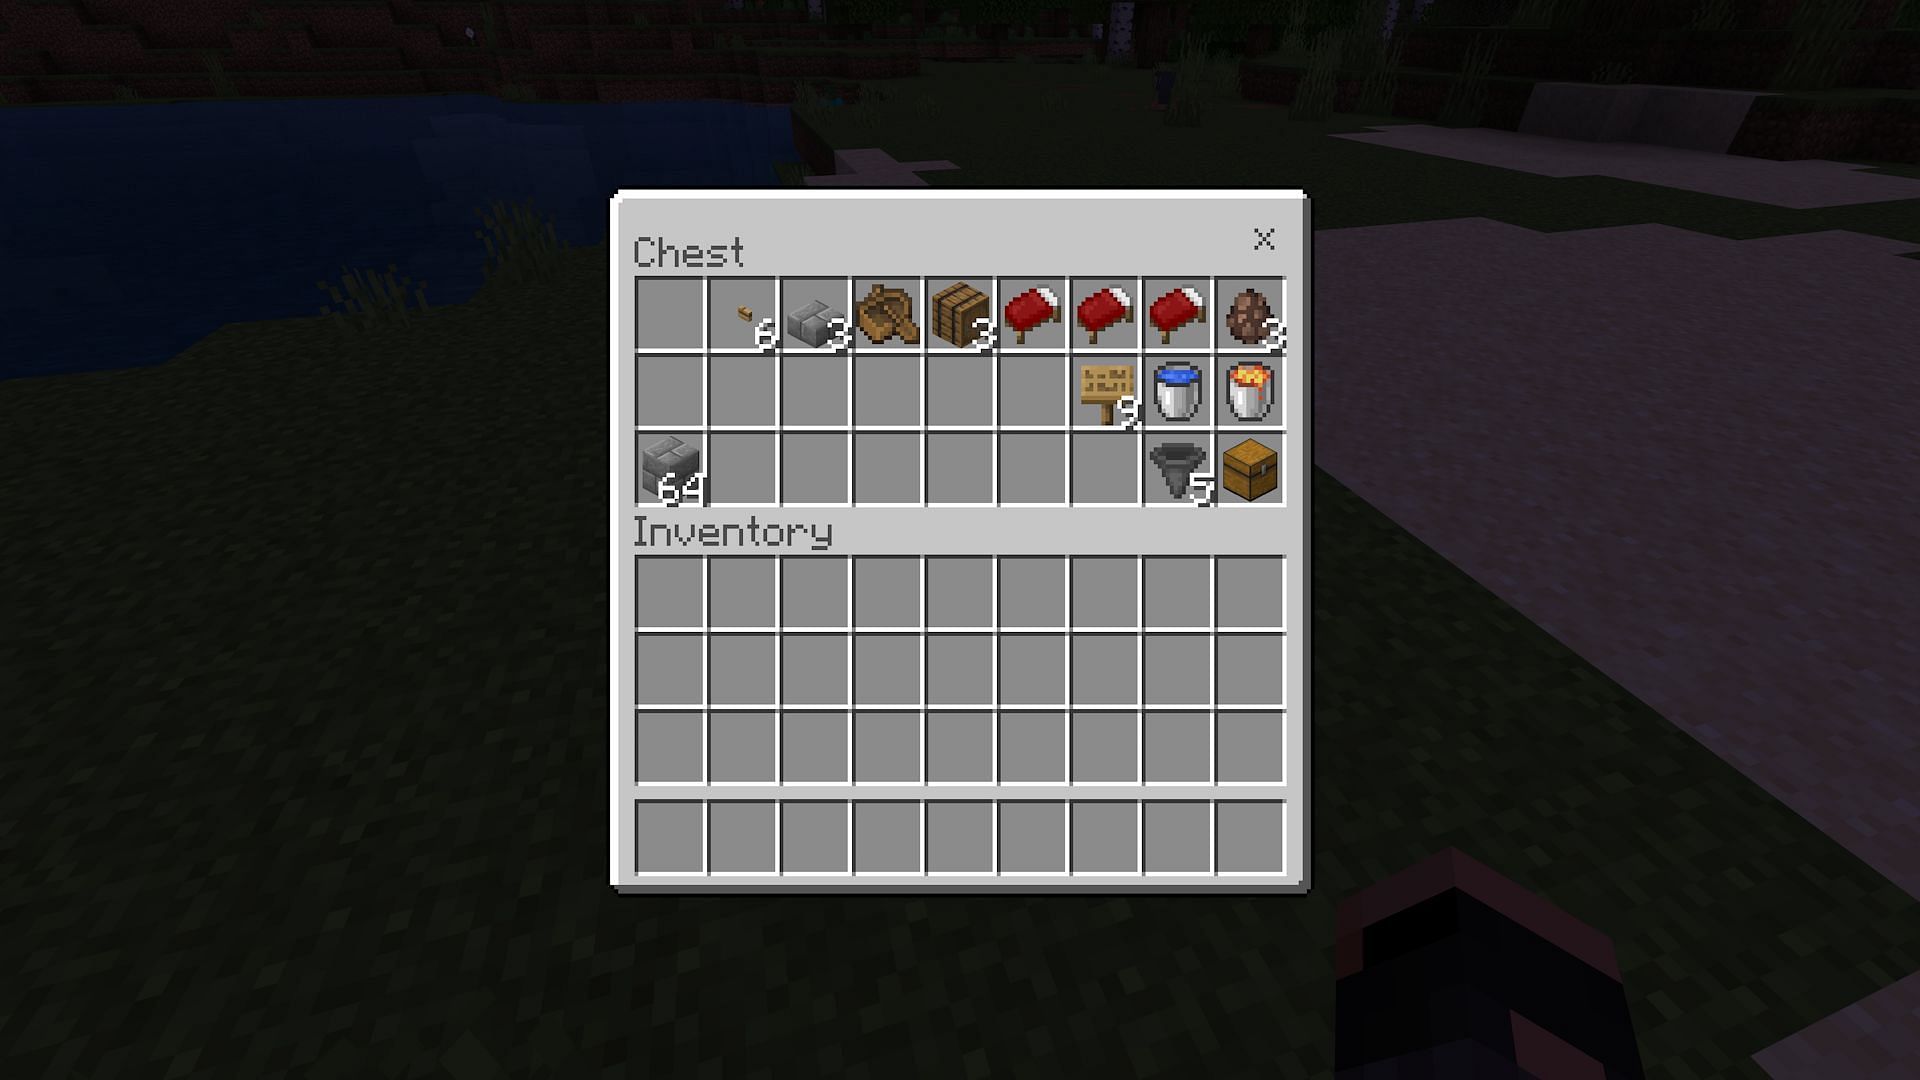
Probably the greatest elements of this easy Minecraft iron farm is that it is very low cost by way of sources spent. The costliest half is the handful of hoppers used, however all the things else is manufactured from wooden or primary constructing blocks.
1) Dig a pit
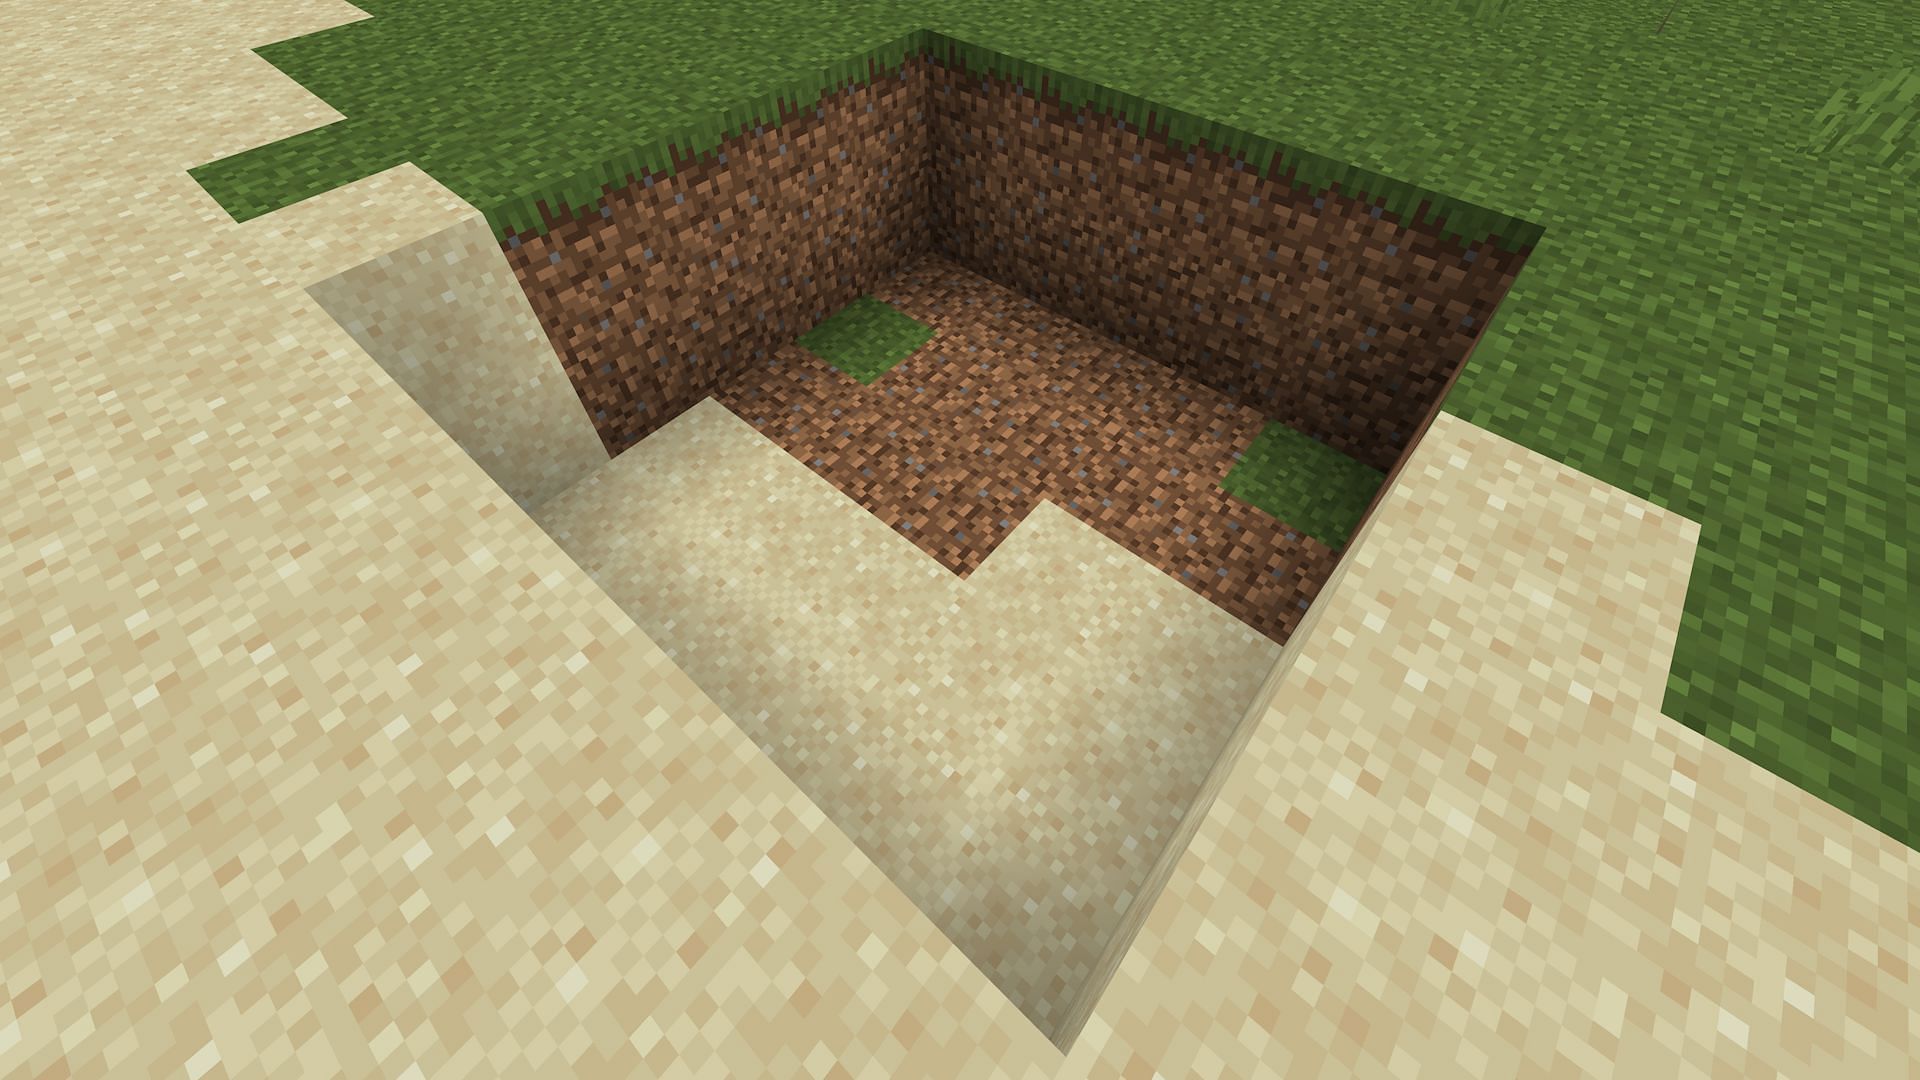
Step one to truly constructing an iron golem farm within the sport is to dig a small pit that may finally be the golem assortment chamber. This pit must be on stage floor and ought to be 5 blocks lengthy, 5 blocks huge, and two blocks deep.
2) Construct the villager holder
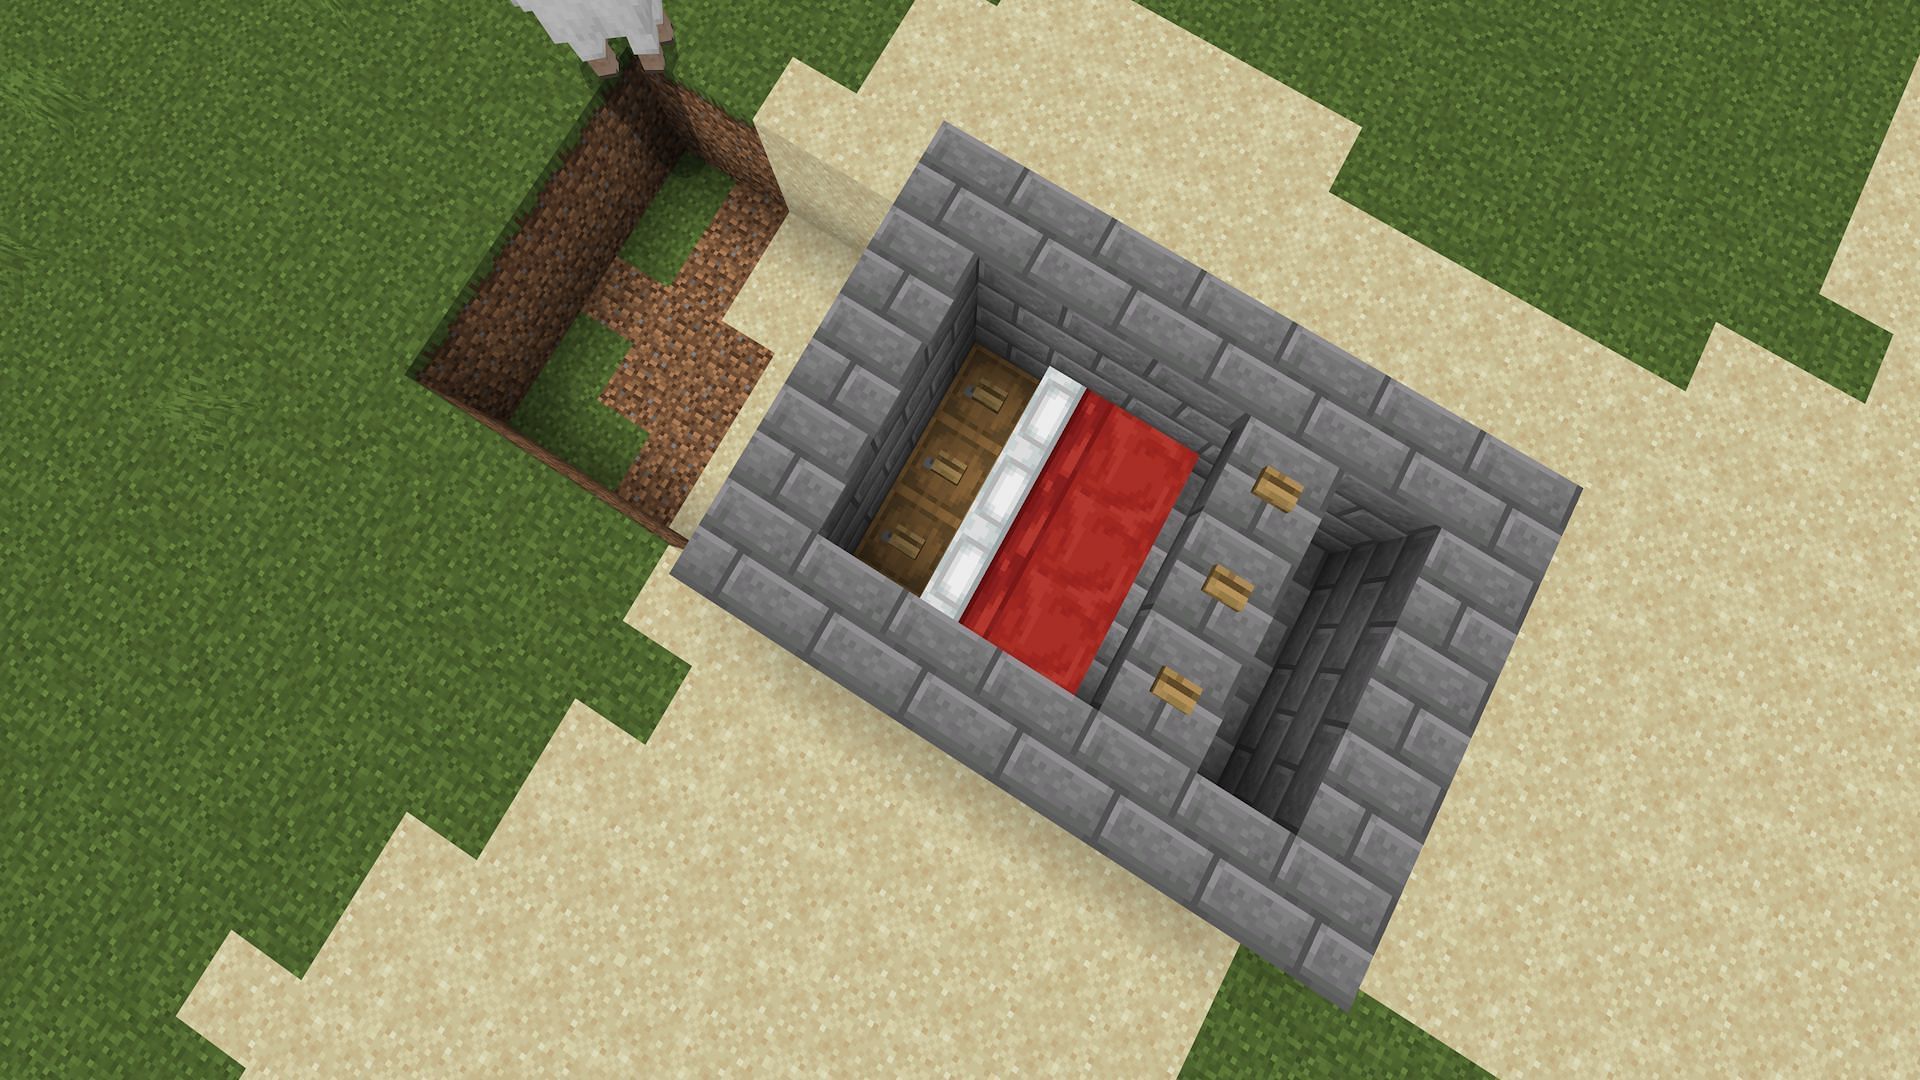
With the golem spawn pit dug out, the following step is to construct the villager assortment chamber. Construct up a five-by-seven space subsequent to the five-by-five pit you dug out. Make these partitions two blocks excessive to cease wandering mobs from leaping in. Place three barrels within the floor alongside the aspect closest to the pit. Then, place buttons on them to cease mobs from spawning on them.
Subsequent, place three beds subsequent to the barrels. There ought to be two blocks earlier than the wall on the finish of the beds. Place half slabs, leaving 1.5 blocks of air, on the row closest to the beds. The ultimate row earlier than the wall ought to be open to the sky.
3) Add villagers
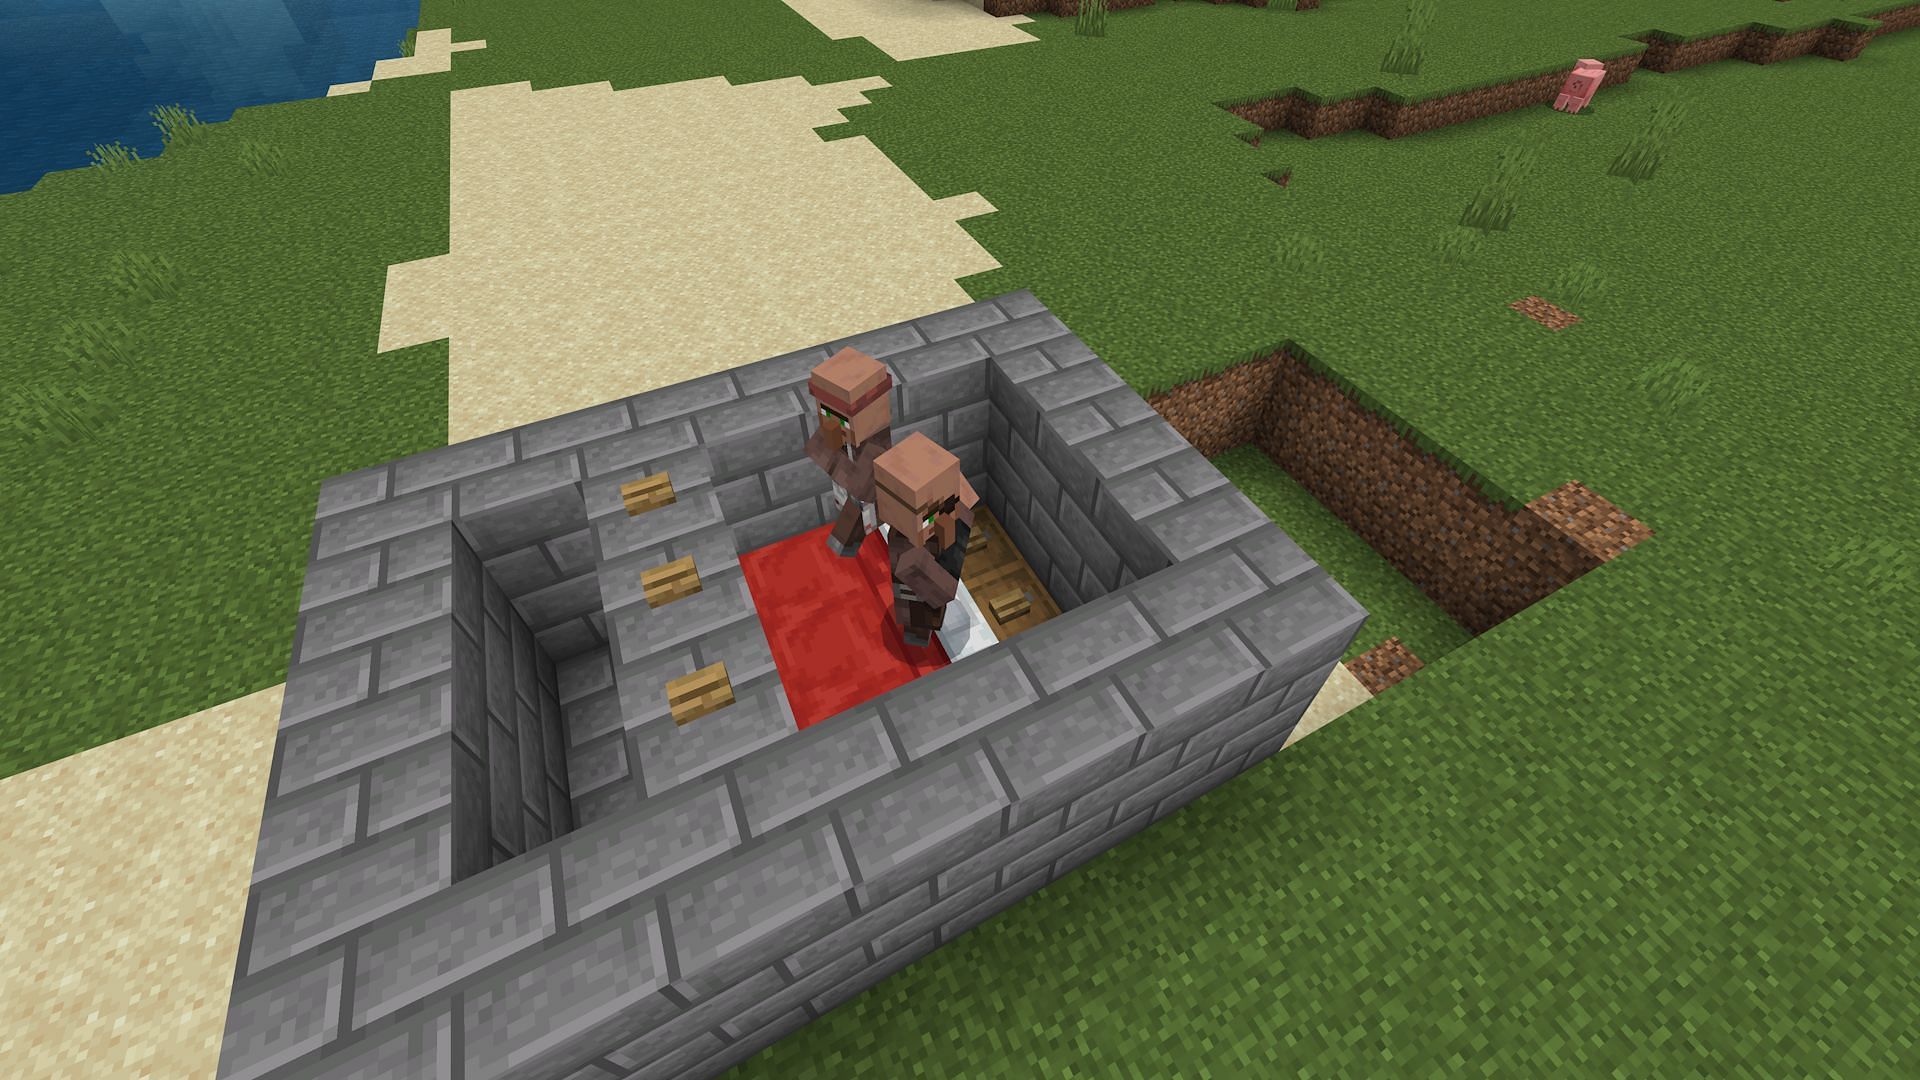
Subsequent, discover some villagers and add them to the farm. There are any variety of methods to maneuver Minecraft mobs, starting from results in boats to custom-made minecart programs. Use whichever technique you favor to get three villagers into the farm. That is the minimal quantity to be thought-about a village.
4) Path across the farm

Use a shovel to transform the grass and filth across the farm into path blocks. The middle of the farm ought to be in the course of a 19×19 block space of paths, for reference. It will cease golems from with the ability to spawn outdoors of the designated water chamber that is about to be constructed.
5) Add within the assortment system and lava
That is the place the golem killing and merchandise assortment chamber are made. Add a sequence of hoppers from the middle of the 5×5 pit out of the farm, linked to a chest.
You probably have a Minecraft storage system already arrange, be at liberty to attach the farm’s output proper to it. Moreover, in case you’re on a 1.21 experimental construct, it could be price connecting the output to crafters to transform iron ingots into blocks.
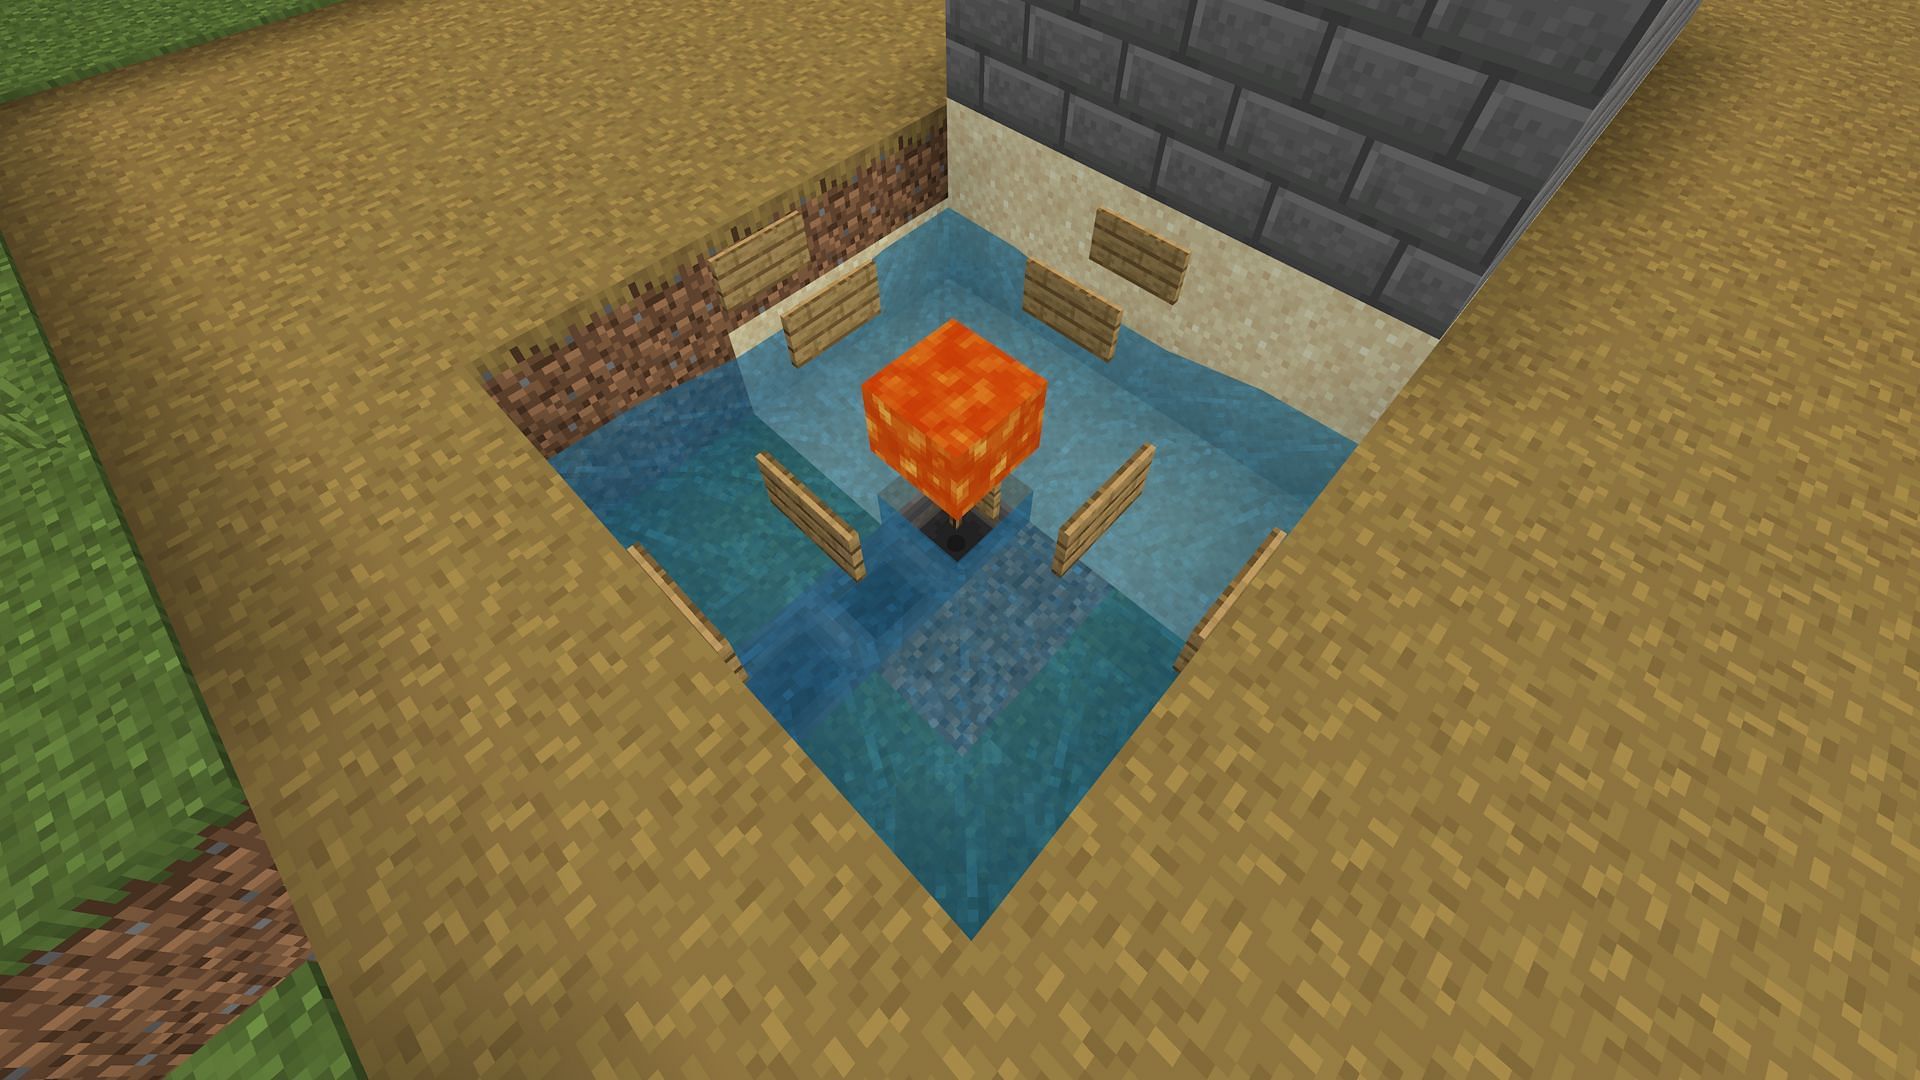
Place an indication on the middle hopper, with two indicators in every cardinal course. It will successfully kind a bowl that may maintain a liquid supply block.
Place a lava supply block right here, with water in every of the pit’s corners. It will push any iron golems spawned into the middle of the farm, the place the lava will kill them, and the Minecraft hoppers can accumulate their drops.
6) Add in a zombie

The ultimate step to constructing a Bedrock iron farm is so as to add a zombie, one in every of Minecraft’s oldest mobs, to the farm. Place a ship, in order that it is beneath the slabs positioned earlier, and permit a zombie to wander into the boat. It will trigger the villagers to panic, spawning iron golems. The slabs positioned earlier will cease the solar from burning the zombie, permitting the farm to proceed operating.
The farm ought to begin functioning as quickly because the zombie is added in and the villagers start to panic.


